How to write a Non-Fiction book in Notion
UPDATE: You can now get the full template with video run-through right here.
Ps: If you’re just getting started with notion, sign up free.
When it came down to writing my book Love is the Business Plan (and other unconventional ideas), I struggled to put my ideas down in front of me in order to see the big picture. I tried physical notecards, a Google Doc, iAwriter (since I like writing in an unobtrusive environment)—but nothing quite did the trick like (drumroll) Notion.
I’ve touted Notion as the best documentation tool out there and I’m a huge fan of finding various use-cases for the tools I’m already using. I had also written in Notion before and appreciate the clean environment a new page provides. So, to get everything in front of me—the ideas, the maybes, the for-sure-this-is-going-in, I created a board view that would make the process of writing and organizing the book 1000 times easier.
Below you’ll find an unabashed guide to what I did, and if you’d like a template to help, send me a DM on twitter. I’ll send you what I’ve got.
The Ideation
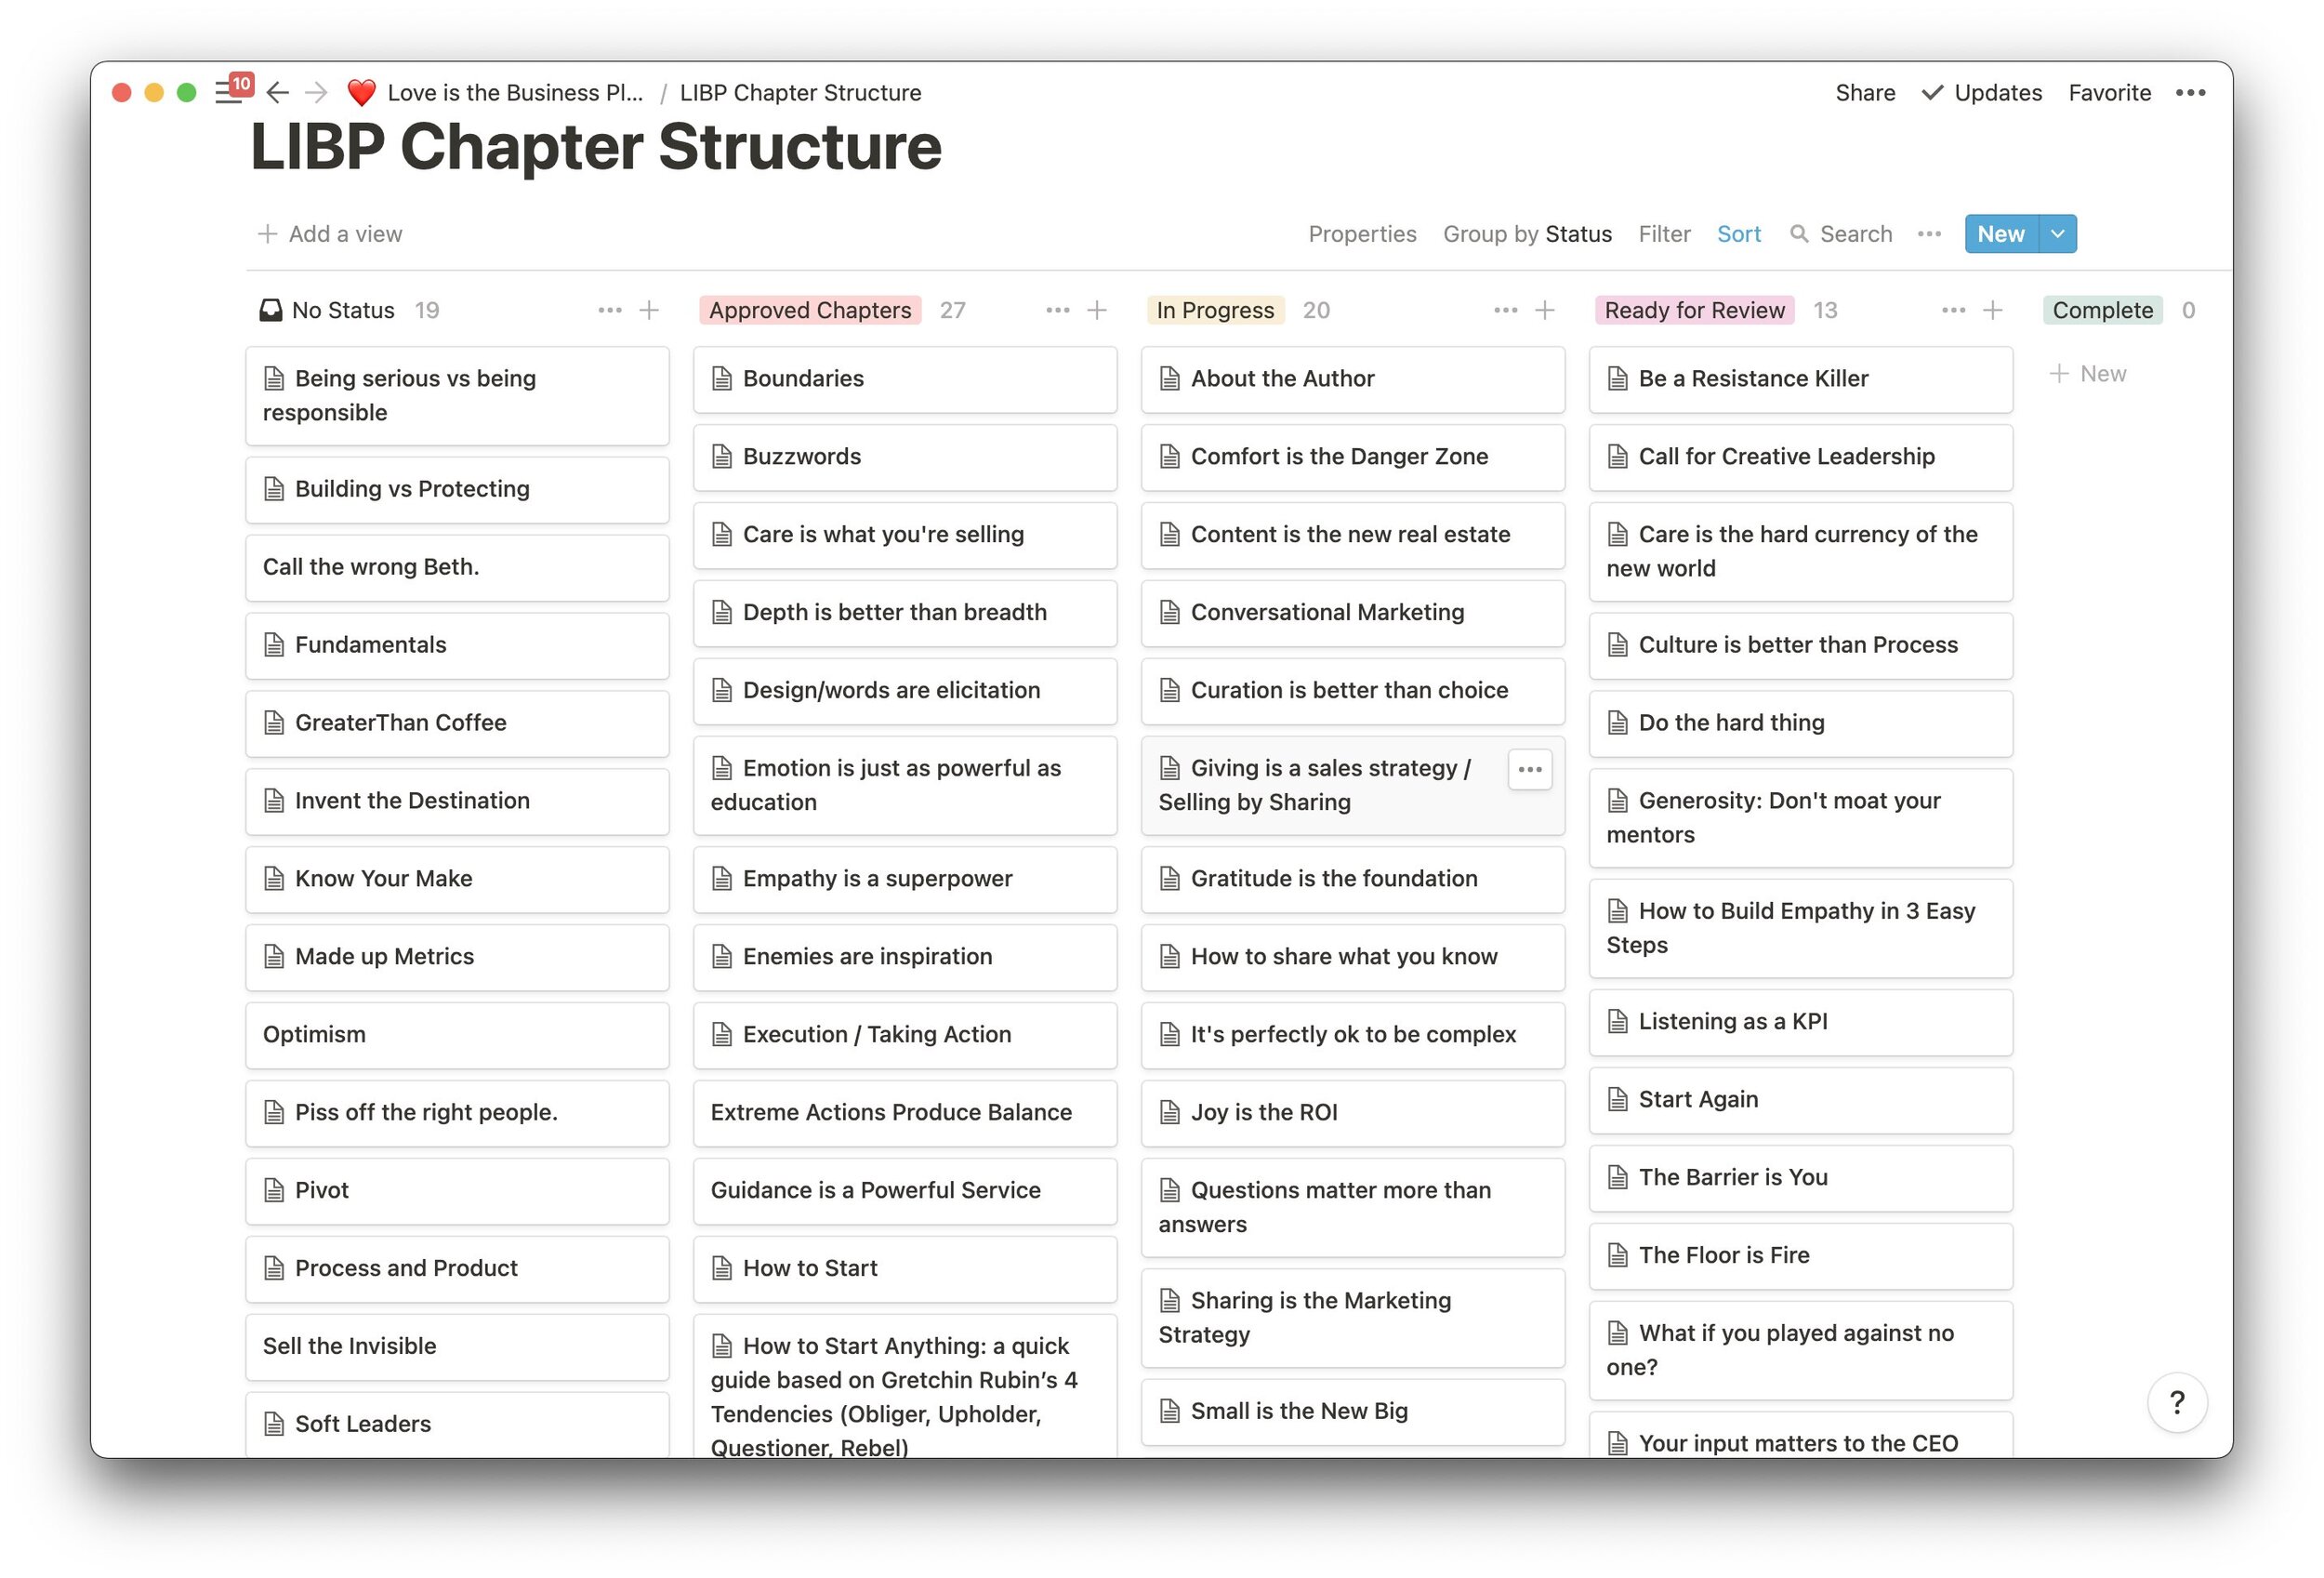
Setup a board called “Chapter Structure”with the following columns:
No Status (this is your idea dump)
Approved
In Progress
Ready for Review
Completed
Add all potential ideas for chapters into your “No Status” column. Each chapter should be its own card.
Join @londonwriterssalon or another writers group to set side dedicated writing time. Pick a chapter to dive into and put your notes, thoughts, ideas, references there. Let it be messy. You’ll refine later.
Repeat with multiple chapters, allowing each session for the chapter of your choosing.
BONUS: test chapters out by writing micro essays or atomic essays and sharing them on Twitter/Instagram/Facebook. See what topics engage. This is not a be-all end-all if a topic doesn’t connect.
The Cut
Use your dedicated writing time to review chapters you think will have the best chance of making it—chapters you KNOW you want to write. Move them into the “Approved” column.
Pick a chapter from the approved column to synthesize the notes, snippets and ideas into a single, cohesive piece of writing. This is your first draft. Move this card into the “In-Progress” column. Repeat for multiple chapters.
When you’re satisfied with a single chapter, move it into the “Ready for Review” column. Here you will read this chapter out loud. No exceptions.
Continue this process until the chapters you have committed to are in “Ready for Review.” Scan your other columns to see if there’s any other chapters that are missing. Quite a few won’t make the cut to this column. That’s okay. Don’t more them, don’t delete them, don’t recategorize them. Just let them be. Keep moving forward.
The Structure

Once you’ve reviewed and refined a single chapter in the Ready for Review column, it’s time to add it to your Master file. This can be Google Docs, Word, Pages or a fancier tool. I used Pages.
Once you add it there, you’ll want to move that chapter card into “Completed.” It’s made it into your book so far.
Turn on your Table of Contents and utilize it. Make sure your chapter title is formatted as a headline. This makes it so much easier when you begin navigating chapters.
Keep adding chapters in the order you want. Remember to move each chapter card to Completed only after it’s been added to your Master file.
After you compile your chapters into your Master File, you’ll want to do a full read strictly for organization of topics. (Grammar, diction, tone will come later). Are the chapters in the right order?
The Refinement
Now go back and read through each chapter looking for grammar, tone and diction mistakes that you might have missed.
Read each chapter aloud. Drink honey tea to coat your throat. You’ll need it.
Send at least one version out to someone else who can read it fully (preferably a professional).
From here, your opportunity to self-publish has begun. At the bare minimum, you should have a formal first-draft manuscript ready.
You can get the template here and if you need help copyediting, organizing ideas, or have questions, send me a DM on twitter. Happy to connect.
“It’s not the book you read that will change your life. It’s the book you write. The process of writing the book makes you better. The discipline of writing, the research that you have to do, the time you have to spend on character development…. Writing a book makes you a better, happier person, before it’s even published. Then once it’s published, it’s the most glorious feeling.”